Geoprotek No Utility Message
 If you are seeing a Geoprotek No Utility message on your solar inverter your solar power system isn’t working, so it’s in your best interest to look into what’s going on ASAP. The two clear signs of the No Utilty issue are:
- There inverter fault light is glowing red
- The inverter display shows a “No Utility” message
The Geoprotek No Utility message tells you that your inverter is not seeing any power from the electricity grid. This can be caused by a number of different things, such as:
- Power outage from the street
- Normal Supply Main Switch is off
- Solar Supply Main Switch is off
- AC Output Isolator (beside inverter if present) is off
- AC plug into inverter is not connected
- Damage to wiring, switches, or other component
Things to Check with the Geoprotek No Utility Error
There are a few things you can check if you’re getting the Geoprotek no utility message as follows:
- Make sure that it’s not a power outage from the street
- The Normal supply main switch in your switchboard should be switched ON (up is usually ON).
- The Solar supply main switch in your switchboard should be switched ON (up is usually ON).
- The AC plug on the inverter is fully plugged in.
- The inverter AC isolator switch (if present) is in the ON position.
If you’ve checked all the above and everything seems okay but you’re still seeing the No Utility message, then it’s time to talk to a solar accredited electrician for further help.
Next Steps To Rectify A Geoprotek No Utility Fault
According to the inverter there’s no electricity coming from the grid, so the first thing a solar accredited electrician will do is check whether the inverter is actually getting power to it or not. If it is, then the problem is with the inverter. If it is not, then the problem is somewhere between the inverter and the grid.

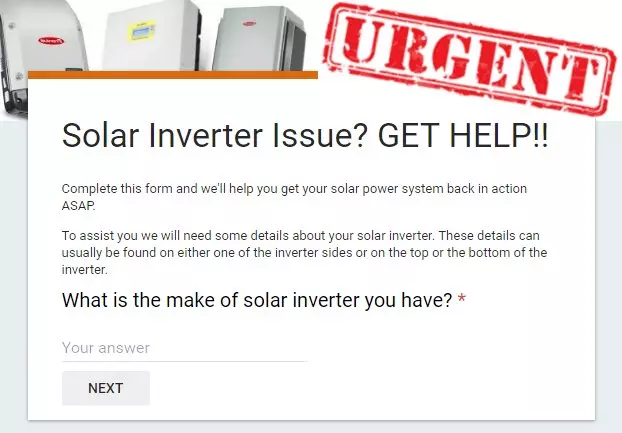
If you are in South East QLD somewhere near the Gold Coast or Brisbane area we can certainly help get your solar power system back in action ASAP.
For further assistance please complete the form above under the URGENT heading so we can help you further.

Got A Question About Solar Power? Click Here For Answers!
- Can you add more solar panels to your solar power system?
- How much power can you expect from your solar power system?
- Do you know how to read your Energex solar power meter?
- Could you be saving hundreds of $$ on your pool power costs?
- How to make the most of the 44c feed in tariff
- How to make the most out of a low feed in tariff

The post Geoprotek No Utility Message appeared first on Gold Coast Solar Power Solutions.
 Do you have a Power One / ABB Aurora Solar Inverter Missing Grid Message? If so your Aurora solar inverter isn’t producing any power so don’t ignore it – take action!
 The Samil Solar River PV Isolation Fault message is your Samil inverters way of telling you that there’s a problem with your solar power system. The PV Isolation fault will need to be rectified ASAP to get your solar power system back in operation.
 The Delta RPI Home E34 Ground Fault message is your inverter telling you that there’s a problem with your solar power system. While you’re seeing the E34 ground fault message your solar power system won’t be working so it’s time to take action!
 Do you have a Ginlong Solar Inverter with a No Grid Message on the screen? If so your solar power system isn’t producing any power so don’t ignore it – it’s costing you money!
 A solar panel voltage calculator is an important tool to ensure a solar power system will function correctly at any temperature it may encounter. This is really important because the voltage from solar panels changes with different temperatures, and it’s very important that an inverter or charge controller the solar panels are connected to can handle the voltage at any temperature the system may experience. If the voltage is too high it could destroy your expensive electronics, too low and it just won’t work. Knowing the range of voltages you can expect the solar panels to produce allows you to avoid some potentially costly mistakes!
 With a solar power system it’s important that the solar panels match the electrical characteristics of the solar inverter or charge controller that they’re connected to. One of these characteristics that’s very important is the minimum voltage the solar inverter or controller can handle. If the voltage supplied from the solar panels is too low it won’t be able to convert the power from the solar panels into useful energy – and that’d be a waste of time!

 The Delta RPI home solar inverter A29 relay open message is your inverter telling you that there’s a problem with your solar power system. The A29 Relay Open message means your solar power system isn’t working, so it’s in your best interests to do something about it ASAP.
 The Ginlong Solar Inverter OV Bus Error message is a sign of an internal error with your inverter, and if you’re seeing it your systems not working so you really want to deal with it ASAP.
 The SolaX DC INJ Fault Message is one of a large number of fault messages that a SolaX inverter can display.

 The Xantrex Solar Inverter DC Voltage Fault is a clear sign your solar power system isn’t working. There are two ways to tell you have this error:


 If your Fronius IG inverter is still within the warranty period or even if your not sure (a 5 year warranty is standard) then you can call Fronius directly on 03 8340 2910 or if your near the Gold Coast or Brisbane you can
  Goodwe NS/DNS Fault Codes and Error messages are found in the Table below.
 Clenergy inverters came standard with a 5 year warranty however Clenergy do not cover any labour time for a technician to come to site and they do not cover the freight costs of sending the faulty unit back to them, so even if your inverter is covered under warranty it’s going to cost you money to get fixed.


